How To Use a Compressor in Live Sound

Dan Nagle • January 18, 2023

Compressors In Live Sound - A Step-by-Step Guide

One crucial tool in your audio engineer toolkit is the compressor. This little device can be a game changer when it comes to managing the dynamics of your mix. But what exactly is a compressor, and how do you use it? Let's dive in!


What is a Compressor?


In the simplest terms, a compressor is a device that controls the dynamic range of an audio signal. The dynamic range is the difference between the loudest and softest parts of a sound. By using a compressor, you can ensure that your quiet parts aren't too soft, and your loud parts aren't too loud, leading to a balanced and pleasant listening experience.


Controls on a Compressor


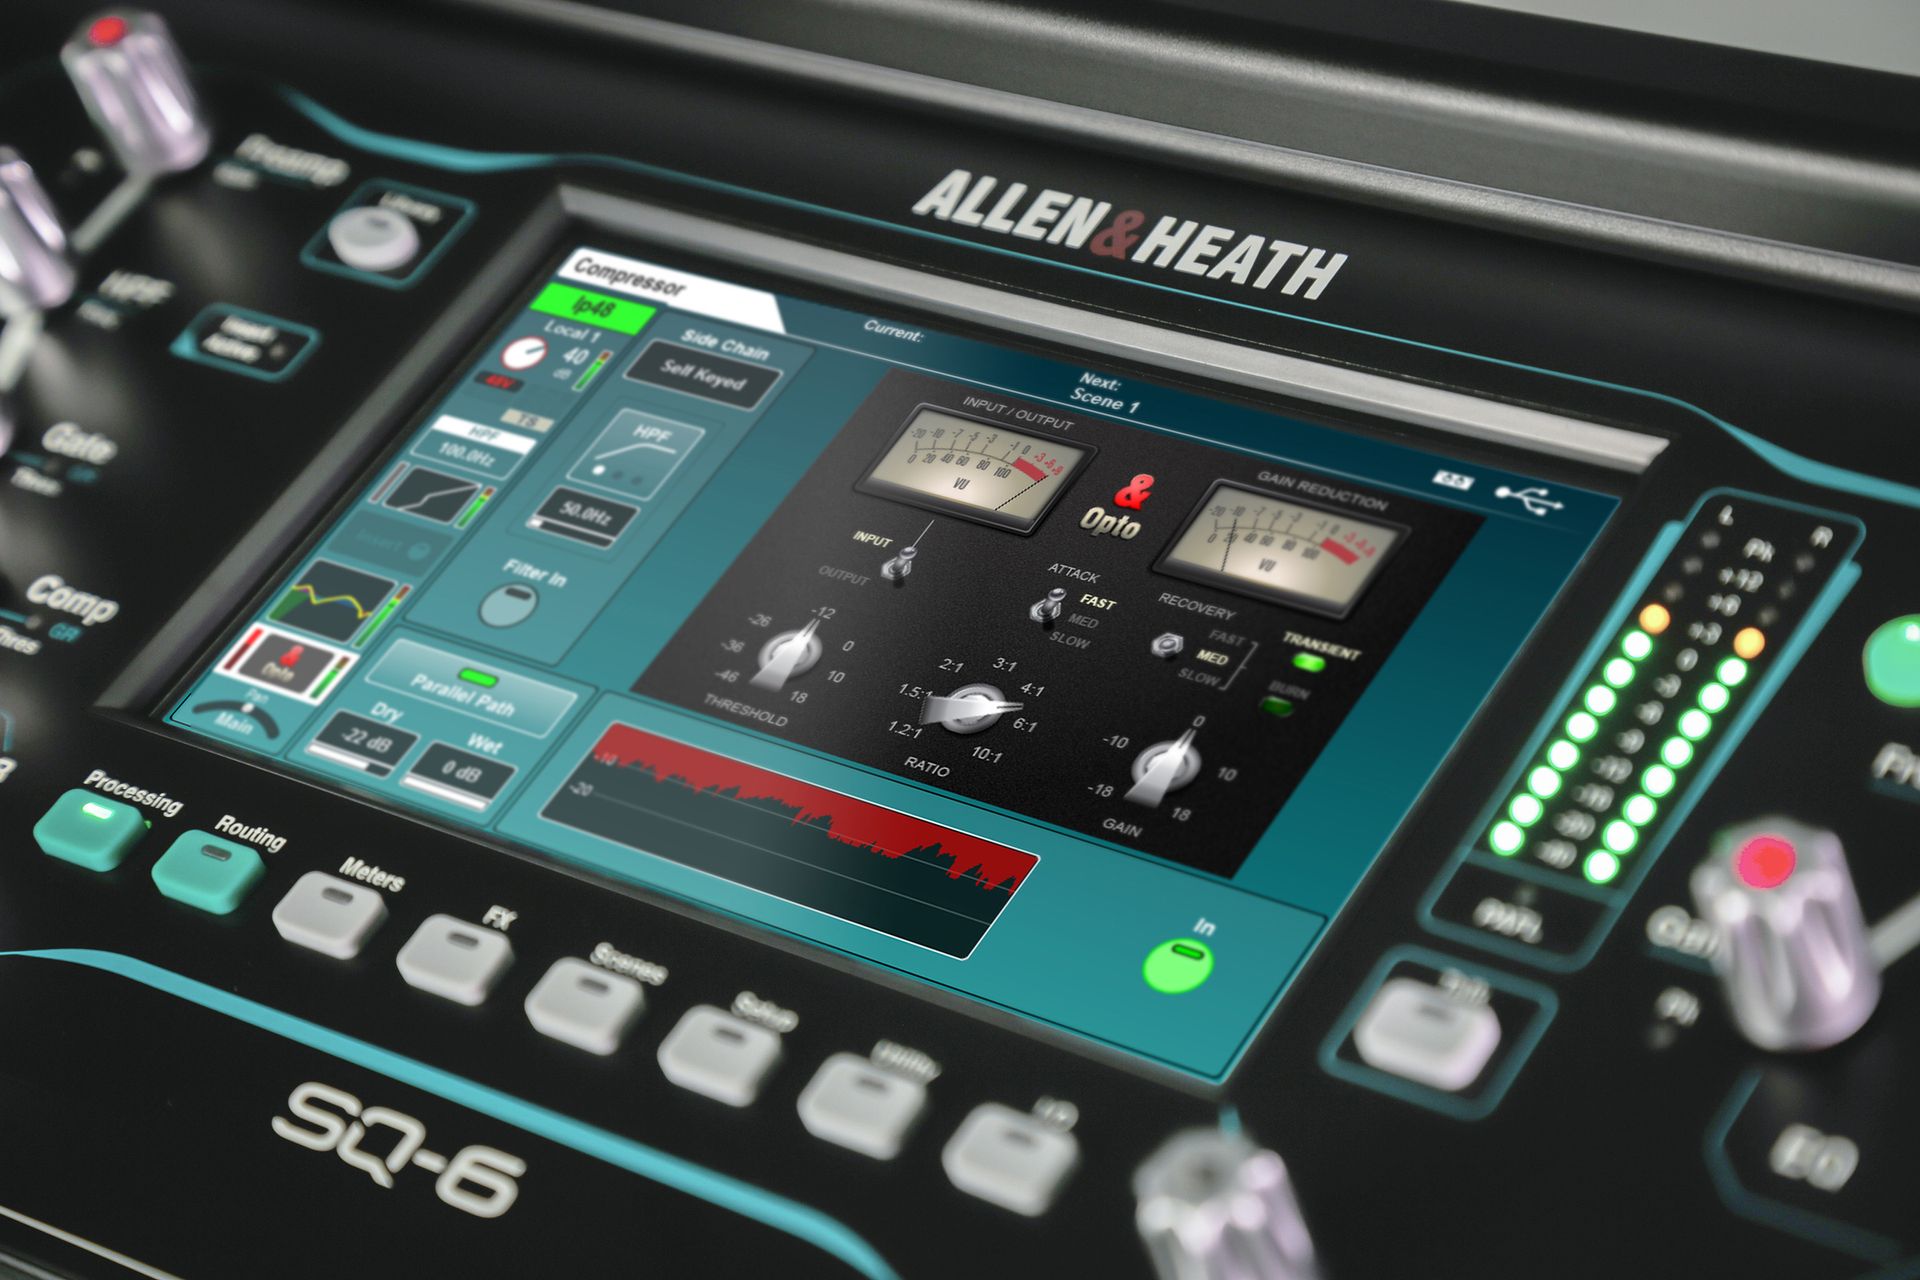
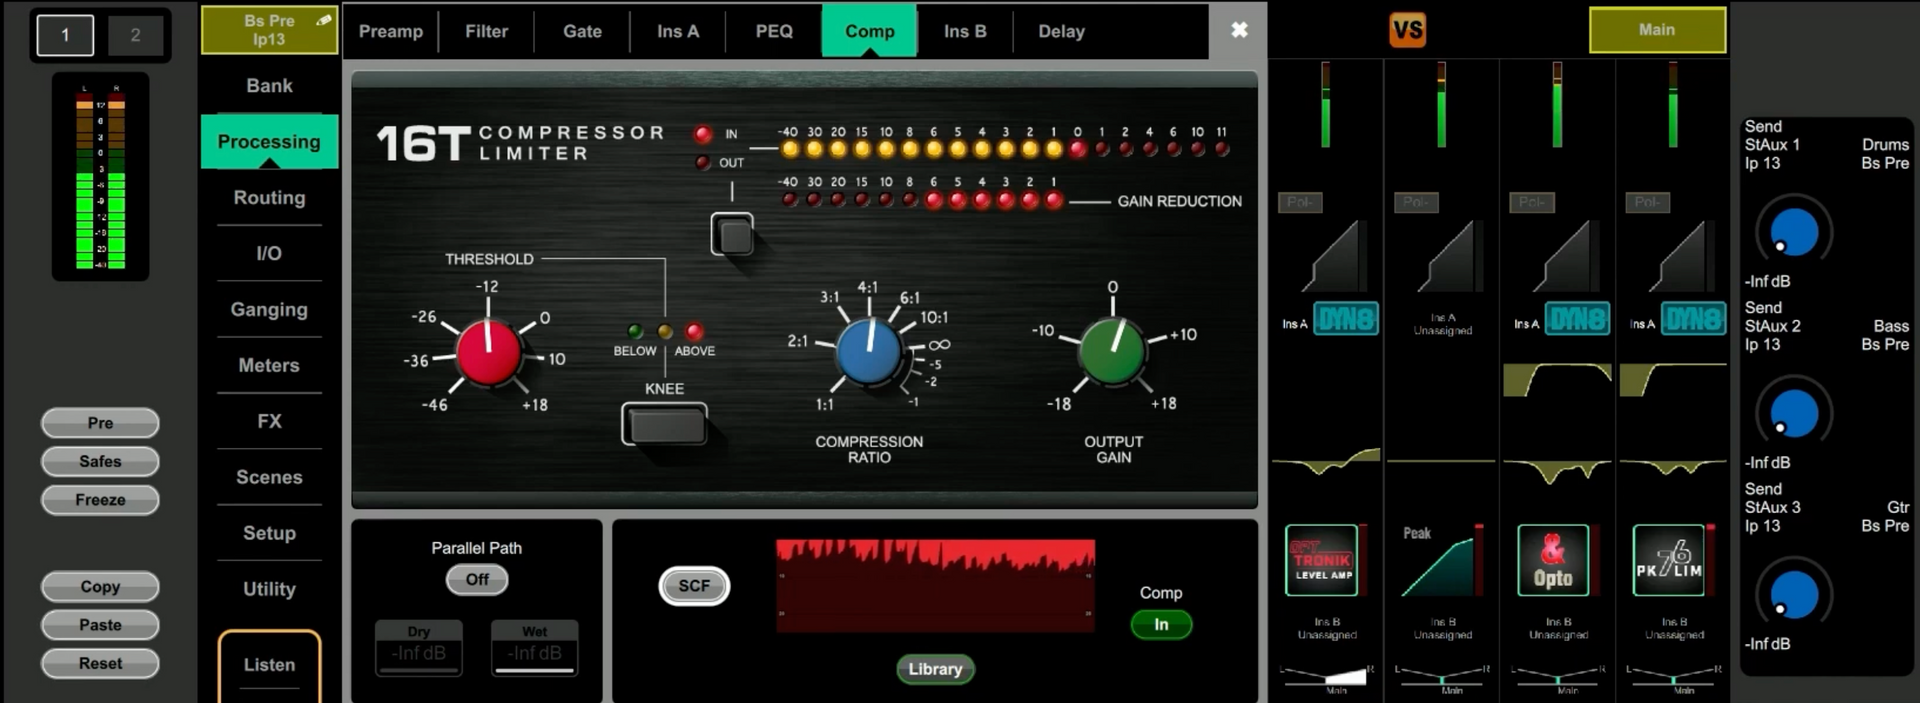
Understanding the controls on a compressor is key to using it effectively. Here are the basic controls you will find on most compressors:


1. Threshold: This is the level at which the compressor starts to work. If the signal level goes above the threshold, the compressor kicks in.


2. Ratio: This control determines how much compression is applied once the signal goes above the threshold. For example, a ratio of 4:1 means that for every 4dB above the threshold, the output will only increase by 1dB.


3. Attack: This is how quickly the compressor starts working after the signal exceeds the threshold.


4. Release: This control sets how long it takes for the compressor to stop compressing after the signal drops below the threshold.


5. Make-up Gain or Output: After compression, the level of the signal is often lower than the original. The make-up gain allows you to boost the compressed signal back up to a desired level.


How to Use a Compressor in Live Sound


Now that you're familiar with the controls, let's discuss how to use a compressor in a live sound context.


1. Set the Threshold: Start with your threshold at 0dB (or the maximum value), and then lower it until the compressor starts to react to the loudest parts of the input signal.


2. Choose a Ratio: A good starting point might be a ratio of 3:1 or 4:1. This is enough to tame the dynamics without squashing them too much.


3. Adjust the Attack and Release: For vocals, a fast attack and a medium release might be a good starting point. For drums, you might want a slower attack to let the initial 'hit' come through and a faster release.


4. Set the Make-Up Gain: After setting the other controls, adjust the make-up gain so that the output level matches the input level when the compressor is bypassed.


Remember, every voice and instrument is different, so there's no one-size-fits-all setting for compressors. The best way to learn is by experimenting and using your ears.


The Magic of Compression


The magic of compression lies in its ability to smooth out the dynamics of a performance. This can help to prevent feedback, reduce vocal strain, and bring out subtle details in the music. When used correctly, compression can help to create a more polished and professional sound in your live mixes. So, don't be afraid to dive in and start experimenting with this powerful audio tool! Just maybe try it first in rehearsal, practise, or with a music track with no live performance happening and a good pair of headphones.


Happy mixing!


  • What is the purpose of a compressor in live sound?

    A compressor in live sound is used to control the dynamic range of an audio signal. This ensures that the quiet parts of the sound aren't too soft and the loud parts aren't too loud, providing a balanced and pleasant listening experience. It can help to prevent feedback, reduce vocal strain, and bring out subtle details in the music.

  • What is the risk of over-compressing with a multiband compressor?

    Over-compression can lead to a sound that is overly squashed or lacks dynamic range. This can make the music feel lifeless and flat. In extreme cases, it can also introduce distortion or unwanted artifacts. It's important to use compression judiciously and always listen critically to the results.

  • How do I know when to use a compressor?

    Typically, you'd use a compressor when you want to control the dynamics of a particular sound source. Meaning, it gets too loud suddenly or often faster than you can (or want to) ride the faders.


    This is often the case with vocals, where the singer's volume can vary greatly, or with certain instruments like drums, which have a high dynamic range.

  • What is the difference between 'Threshold' and 'Ratio' on a compressor?

    Threshold and Ratio are two key controls on a compressor.


    The Threshold is the level at which the compressor starts to work - if the signal level goes above this, the compressor kicks in.


    The Ratio determines how much compression is applied once the signal goes above the threshold. For example, a ratio of 4:1 means that for every 4dB above the threshold, the output will only increase by 1dB.

  • What is a multiband compressor?

    A multiband compressor is an audio processing tool that allows engineers to compress different frequency bands independently. This means different compression settings can be applied to the lows, mids, and highs of a sound, offering greater control over the balance and character of the mix.

  • Can I use a compressor on all channels in a mix?

    While it's technically possible to use a compressor on all channels in a mix, it's not usually necessary or desirable. Compression is a tool to be used judiciously, as over-compression can lead to a mix that sounds lifeless and lacks dynamics. It's generally better to use compression where it's needed most, such as on vocals or certain instruments with a high dynamic range.

  • What's are 'Attack' and 'Release' on a compressor?

    Attack and Release are two other important controls on a compressor.


    The Attack is how quickly the compressor starts working after the signal exceeds the threshold.


    The Release sets how long it takes for the compressor to stop compressing after the signal drops below the threshold. Different settings can have a big impact on the sound, and the right settings depend on the specific sound source and what you're trying to achieve with the compression.

November 5, 2025
It’s tech week. Your show is built. You’ve got cues for the main PA, for the on-stage monitors, for the subs, and for the lobby speakers. You plug in your trusty 8-output USB audio interface, open your cueing software—be it QLab, Show Cue Systems (SCS) , Canvas , Multitracks Playback , or even OBS for video—and... it only sees two outputs. "Speakers (L/R)". You're losing time, the director is asking to hear the cue again, and you just need it to work. Don't panic. This is one of the most common and frustrating problems in pro audio, and the fix is almost always the same. Your hardware is not broken. The problem is your drivers and configuration. This guide will walk you through the fix for both Windows and MacOS . For MacOS Users (QLab): The Answer is Audio MIDI Setup
November 3, 2025
The way we watch movies is changing. Audiences are increasingly skipping the traditional big-box cinema, looking for a unique experience without the sticky floors and high-priced junk food. This shift has sparked a boom in pop-up screenings, from outdoor film festivals and municipal "movie in the park" nights to live theatres using their off-seasons to generate new revenue. No matter the venue or the season, the challenge for all these groups is the same: sourcing projection that is portable, bright enough to compete with ambient light, and delivers the stunning 4K experience audiences now expect.
October 16, 2025
This year's "Mission Impossible" Award goes to an individual who defied the odds, who stared down technical nightmares and emerged victorious. Their ingenuity transformed what seemed impossible into a breathtaking reality... 
More Posts